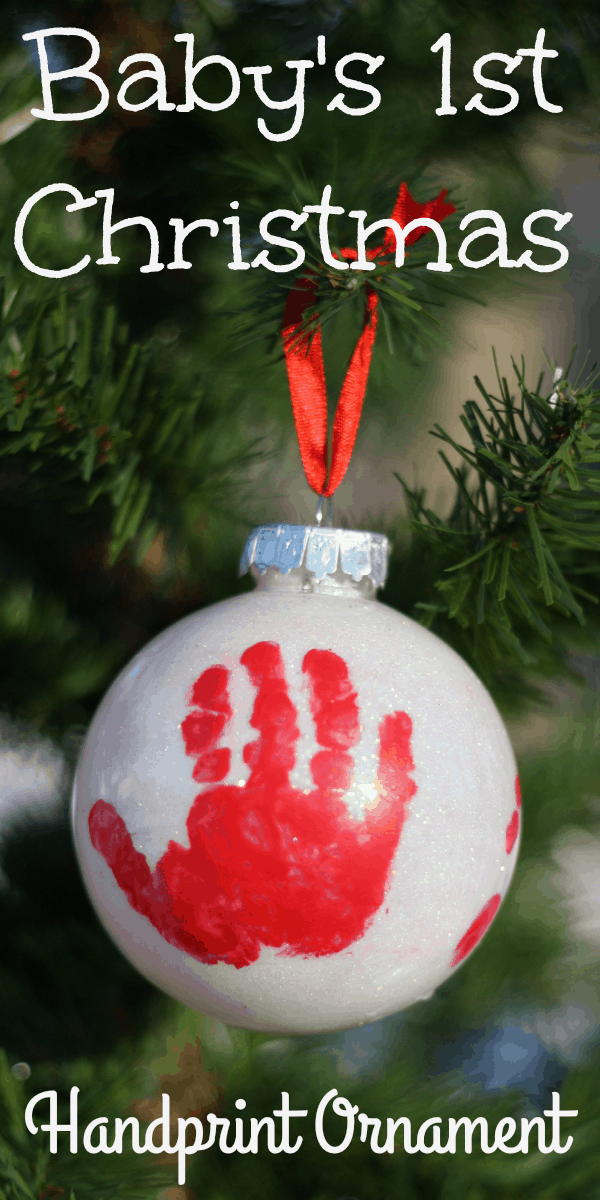
Handprint Ornament for Baby’s First Christmas

Handprint Ornaments
Post by Contributing Writer Amy
My favorite ornaments on the tree are always ones the kids have made, but nothing can compete with their baby handprint ornaments. We make an ornament each year (see this year’s here), but their chubby little baby fingers melt my heart and always will. I have made this ornament for each of my girls’ first Christmases and really wanted to do it for my friend’s sweet baby boy. We ended up making one for all three of her kids and they all turned out beautiful!
How To Make A Baby Handprint Ornament
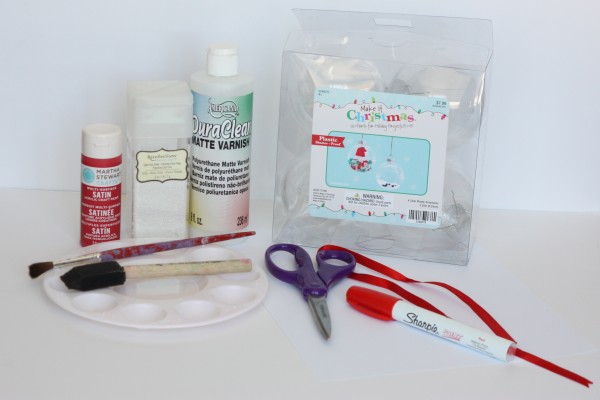
You’ll need:
- Clear Ball Ornaments (I used 3.25 inch plastic ones from Hobby Lobby.)
- Clear Varnish
- Fine white glitter
- Sheet of paper to make a funnel for the glitter
- Craft Paint
- Paint tray
- Foam brush
- Ribbon for hanging
- Scissors
- Paint Marker (optional)
- Baby wipes for clean up (not pictured, but necessary!)
Handprint Ornament Instructions:
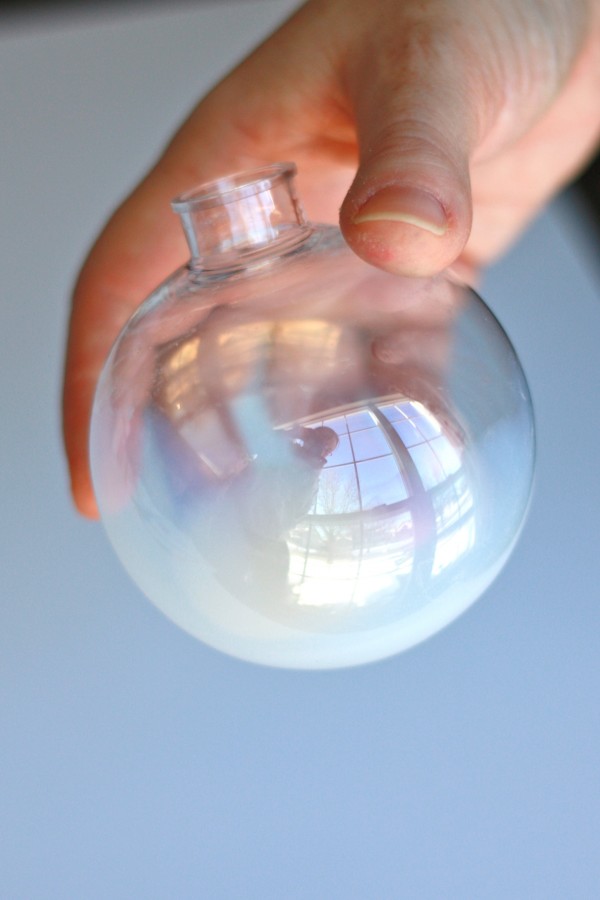
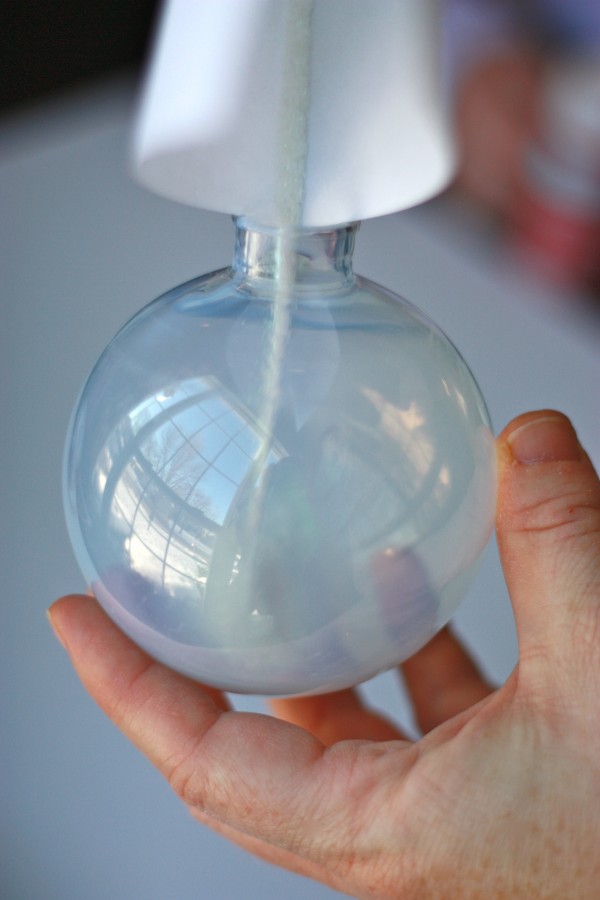
Take off the top of the ornament and pour some clear varnish into the inside. Roll it around with your hand until all the inside surfaces are coated in varnish. If there is any extra varnish, let it out upside down and wipe it up. You want the inside to just be coated, with no puddle of varnish left in the bottom.
Pour some fine glitter onto a folded piece of paper and use it as a funnel to get the glitter inside the ornament.
Roll it around with your hands again to get the glitter to coat all of the varnish. Add more as needed. Let it dry with the cover off upside down.
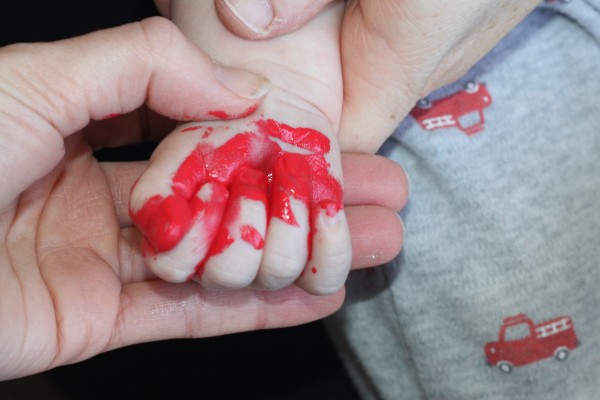
It’s hand print time! You’ll really do best with two adults for the hand printing part if you are doing a baby’s hand. Do whatever you can for a happy baby! We waited until the little guy woke up from his nap and even though he was really happy, he was really clenching his fists. We sang, let big sister and brother do their tricks for him, and gave him his pacifier. I painted his hand with the foam brush and printed it on the ornament….about 8 times! You will not get a perfect handprint from a baby, but don’t worry! The one I used started far from perfect.
YOU MAY ALSO LIKE: Best Handprint Art Ideas
You can wipe it off with a baby wipe and make sure it’s dry before you try again. Notice all the wadded up baby wipes smeared with red paint in the background. :)
I used a baby wipe and cotton swap to clean it up. Then, I dabbed my pinky in the some of the paint to fill in areas that were a bit light. Depending on the size of your baby and ornament, you can do their foot on the opposite side of the hand. It is so much easier than the hand! It helps to roll the ornament onto the foot and it only took one try.
Replace the cap and tie on the ribbon, and find a place to let it dry completely. If you’d like, you can use a paint marker to write the child’s name and the year on it.
The big brother and sister really wanted to make their own ornament to match their baby brother’s, so we did. At ages 3 and almost 5, their hands still fit on the ornament and they were so much easier to get a clear handprint in only one try! When the ornaments are dry, be sure to brush some clear varnish over them to help protect those precious prints from getting scratched off!
How sweet are these matching baby brother, big brother, and big sister ornaments? Even when these little hands are much bigger, I think their mama’s heart will melt each year she hangs these on her tree.
Amy is a former reading and third grade teacher as well as a mother to three little girls with big personalities. She believes joy can always be found in playing, learning, and ice cream.








 Amy is a former reading and third grade teacher as well as a mother to three little girls with big personalities. She believes joy can always be found in playing, learning, and ice cream.


